

I recently learned that I am raising a gerbil:
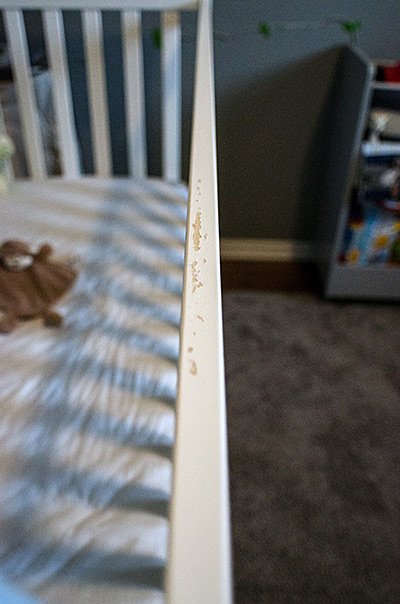
I’m open-minded and an animal lover so this would have been fine, until I read one comment on a forum where someone said her kid chipped his tooth gnawing a crib rail. That and I don’t like my young boy eating paint. I needed a cover!
I decided to use fleece (it’s cushy on the chompers) but wasn’t sure on just tying it on. Could he pull it up with his little bunny teeth (switching rodents), rip a hole and/or eat the fuzzies? I needed a top layer.
Miklos had the great idea to use some PUL leftover from cloth diaper making. PUL is water resistant and tough. I had leftover KAM snaps too for fastening.
Making the crib rail cover took a little over an hour while the boys were at the market on Saturday morning.

Here’s how to do it!
Materials:
- Sewing machine
- Fleece (I used microfleece I had on hand)
- PUL
- Pins
- Scissors / rotary cutter
- Ruler
- Cutting mat
- KAM snaps – size 20
- Awl and KAM snap pliers
NOTE 1: You could also sew in ribbons for fastening if you don’t have snaps. And woven cotton quilting material might be good for over the fleece, depending on how ‘chewy’ your baby is.
Measure crib rail length and height (not shown), doubling the height for wrapping around; add a bit extra for seam allowance and for fastening under the rail.
Our crib rail was about 2.5″ high. I decided on 8″ total. Maybe I should’ve done 7″ but I like to leave lots of room for error.
I also reduced the crib rail length by a couple of inches so I could pull it securely onto the rail without worry of it shifting when chewed on.
IMPORTANT if using stretchy fabrics:
Make sure your long edge is the stretchier length of fabric. This way you can pull the cover tightly and fasten it on. If not, it may not fit on the rail properly.
NOTE 2: Quilting cotton won’t stretch like that, in which case cut exactly as long as your rail is.
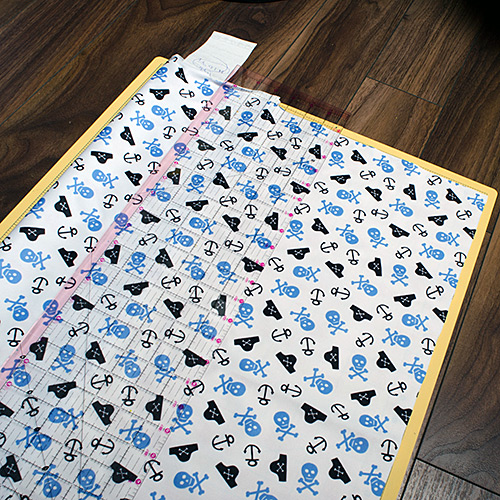
Line up your top layer material (mine is PUL) along straight edges and cut according to your measurements. Do the same with fleece.
After cutting both strips of material, line them up — right sides together.
Pin stretchy fabrics carefully so they line up — I kept tension constant on both fabrics while pinning every couple of inches, points facing out along the length.
Once pinned, sew one short end together using a straight stitch.

Sew a long end next and continue to stitch almost all the way around the cover — leave a small hole near your last corner corner where you will pull the cover right-side out.
NOTE 3: If using ribbon ties to fasten your cover, place as desired BETWEEN the two right sides leaving some extra hanging out and pin.
I sewed pretty close to the edges but you do whatever suits you. I knew I’d finish with a top-stitch so I didn’t want my edges too bulky once right-side out.
Speaking of! Turn it right-side out.
Easiest way for me was to stick my thumb in the hole, scrunch up the whole thing until my thumb felt the diagonally farthest corner, then pinch and pop that far corner through the hole. Easy!
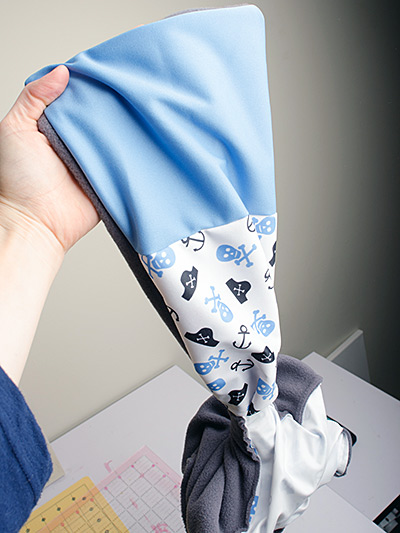
Pulling right-side out! Woo hoo! (I added some solid PUL because I didn’t have the length I needed in the printed kind.)
Roll those inner seams out with your fingers to reduce any bulkiness, then iron on low on the PUL side for a clean, pressed look.
You can come up with your own clever way to seal that corner hole or you can fold it in and top-stitch around like me.

If using stretchy fabric, pull the crib guard tight over and along the rail and figure out where to place snaps — like I did above. Place your snaps then!
I was going to place the snaps as low as possible at the corners for aesthetics but then I remembered the boy could pull that up easily because I left so much extra height. I added a few extra snaps along the rest of it for this reason too.
NOTE 4: If you’ve sewn ribbon ties instead of applying snaps, tie it on and you’re done.
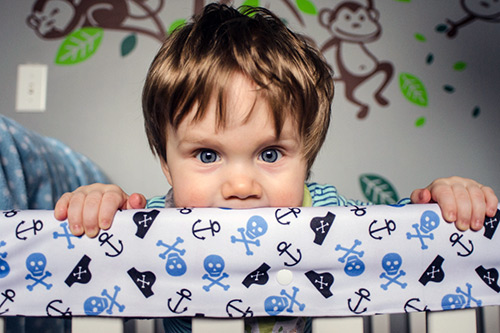
Place your Tester Bunny in the baby-prison.

And celebrate! It works!
I had only noticed bite marks on the front rail but I’ve since remembered I have monkey PUL that would match the theme of his room much better. *smacks forehead* This pirate one will be moved to the back and the new monkey one up front.
I hope this tutorial was easy to follow! Please Pin or share it and let me know in the comments what you think.
Thanks for stopping by!


Thanks for putting this together! These are very simple yet detailed steps to make my own crib rail cover.
You’re very welcome!