Hey there! I hope you’re doing well. Here’s that beach tote DIY I promised you.
This post contains affiliate links. I earn a small commission from products purchased, and that helps keep my blog alive.
The admittedly mild winter and chillier than usual spring had me dreaming of summer early on this year. That’s why, I assume, when we went to our local IKEA during one of winter’s last blasts, I saw an unlikely item and thought “Hey, that’d make a cute beach bag!” And — just to make things different — I decided to try and make it a fully hand-sewn project. No machine needed! (You can definitely use a machine if you want to speed up the process, though. Just be sure to use heavier duty needles and you should be set.)
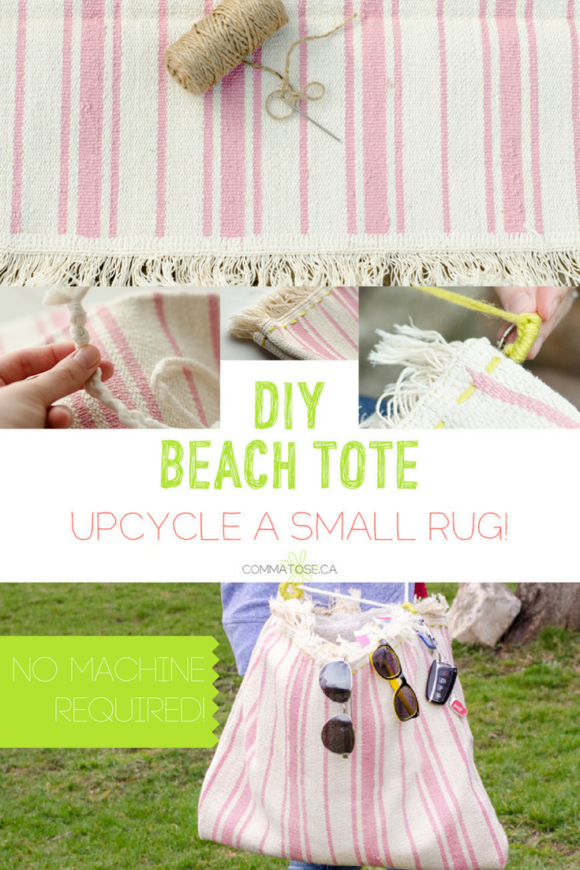
Materials:
- Small rug (I used a 85 x 55 cm SIGNE rug from IKEA for $3.99)
- Twine
- Large eye tapestry needle (I got mine from Walmart, but the ones I’ve linked to would work perfectly)
- 2 binder rings
- Quilting clips / metal binder clip / clothes pins / similar… something to hold bag sides together while sewing
- Yarn in a complementary colour
- Soft rope
If you’re an avid crafter, you may actually have the items needed on hand, or — if not — an appropriate substitute! Whenever I find a neat idea on Pinterest and I’m missing materials, I try to think outside the box to use up stuff we already have, even if it’s not exactly the same. For example, I later found wooden rings which would’ve looked awesome on my finished bag, if only I had woven them into the twine at the start! Use what you have, that’s the moral of the story.
DIY Beach bag instructions:
1. Fold your rug once in half, making sure that the “good” sides are facing each other (the “good” ones are the ones you want on the outside of the finished bag). Make sure the short ends are touching.
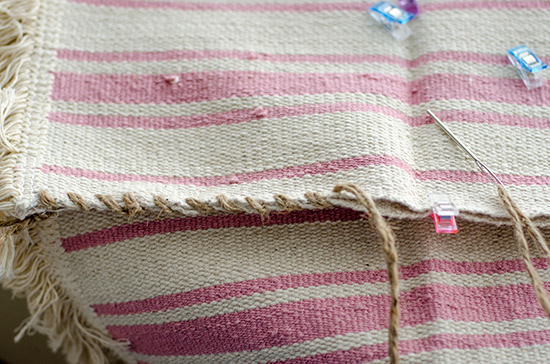
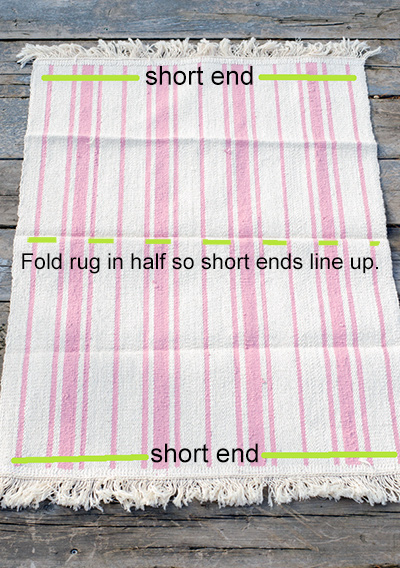 2. Line up the sides and top of your rug, and clamp down the two sides, leaving alone what will be the top/opening of your bag. I used these quilting clips. Binder clips would also work, as noted in Materials.

Line up your sides and clip together to prepare for sewing!
3. Using a generous length, insert twine through the eye of the tapestry needle, knotting the two ends. For mine, after knotting, this length of twine was 3 times the width of the rug. I could’ve used 2 times the width, but extra twine is great because it’s easier to knot later on.
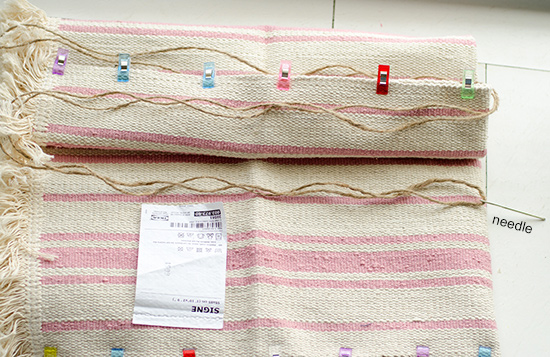
Ooh, twiney! That length is so very generous. That’s what you want.
4. Using twine and your tapestry needle, stitch from the top (in my case, from just below the fringe), pulling twine all the way through so the knot you made in your twine secures your stitch at the top of the bag.
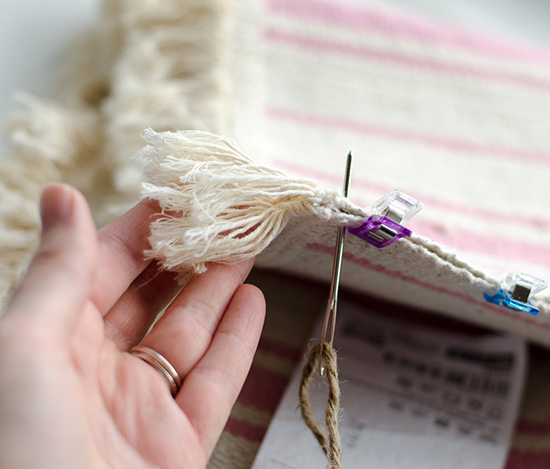

Stitch down the sides, in one side & out the other, always going in from the same side. This will be a sturdy bag! You don’t need to be precise here, but try to stay within the same couple of woven lines if you can, so your sides will look nice and tidy when you’re done.
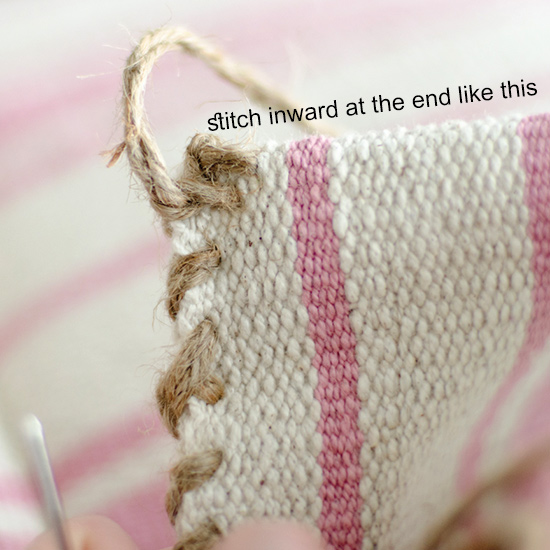
5. At the end, stitch a little more inward. See picture to understand what I mean. This will round your corners just a little once all is finished. Then, tie a knot, or two… or three, if you’re me, until you’re feeling pretty secure about the whole thing.
 6. Repeat steps 4 & 5 along the opposite side.
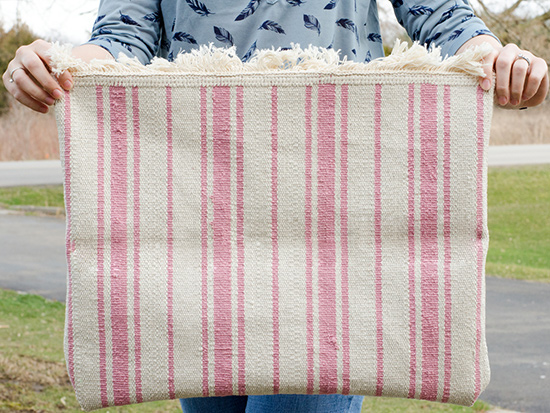
7. Turn right-side out! The hard part’s over — and it wasn’t that hard at all, right?
OPTIONAL DECORATIVE STITCH:
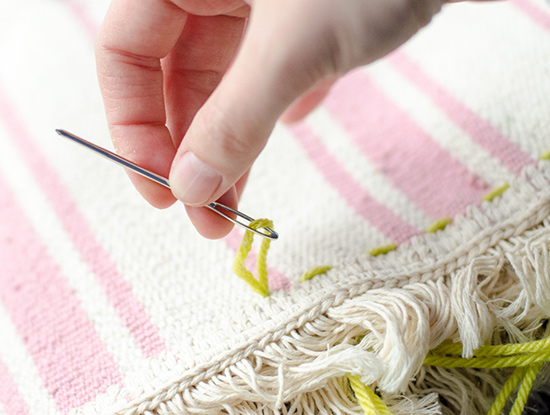
Insert coordinating or complementary-coloured yarn through your tapestry needle’s eye the same as you did the twine, knotting the end and measuring accordingly. Weave through the rug however you like. I just did a straight line across each side of the bag, so that it’d make my rings pop. (What rings?? Well you’ll see.) I knotted at the ends the same as before with the twine. This whole step took a couple minutes, max and I think it was worth it!
 7. Clip a binder ring through the first stitch you made with your twine in each side of the bag at the top. (2 rings total.) These will hold your strap.
You might be thinking, “But they’re so boring like that!” True. Why not do some fancy yarnwork around the binder rings? If you crochet or knit, you might have a better idea than I did. I just took a good length of yarn, knotted the ends the same way as with the twine and yarn earlier. Then I did this with very little precision (which may be obvious) all around each ring.

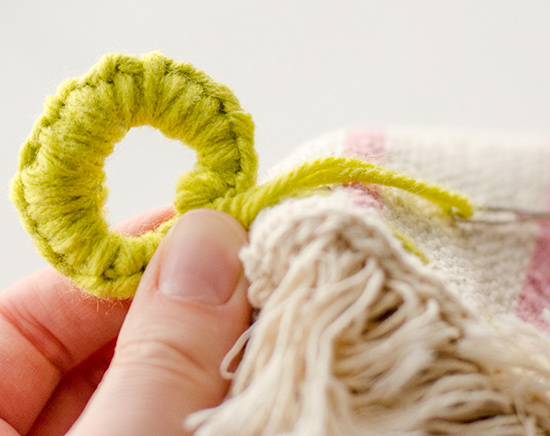
At the end, around that twine stitch where we started, tie a double knot (like the first step of tying your shoes, twice). Trim ends of yarn off, being careful not to cut through your twine.
8. Next, simply thread a comfortable length of soft rope through your rings and tie off, trimming the ends where you like best.
YOU’RE DONE! Pack it with some towels (maybe some cute ones, which I do not currently own), sunblock, sunglasses, clip your keys on, a good book, some snacks and your favourite refillable bottle full of water and head to the beach!
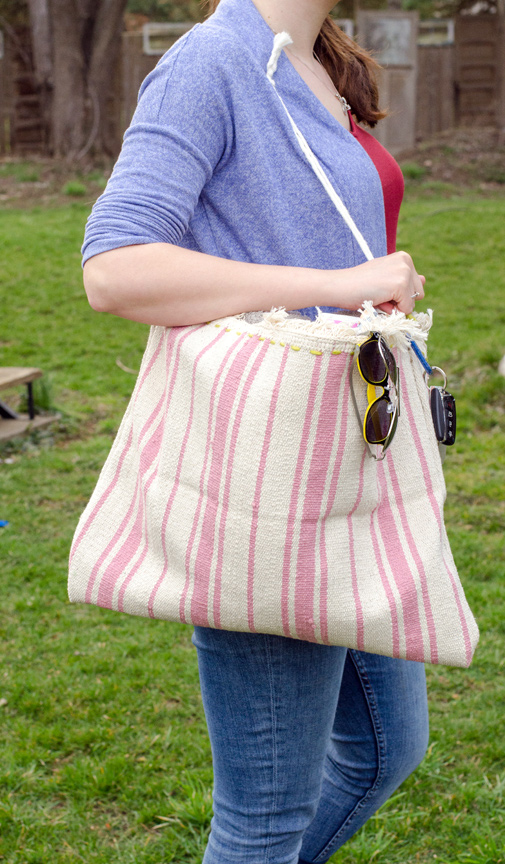
I really love the beachy tones of this bag, and — holy cow — is it ever sturdy and huge! There’s room for at least 5 towels in here, along with everything else. We got to use it this week and there was more than enough room. Excited to fill it up with beach goodies again and again this summer.

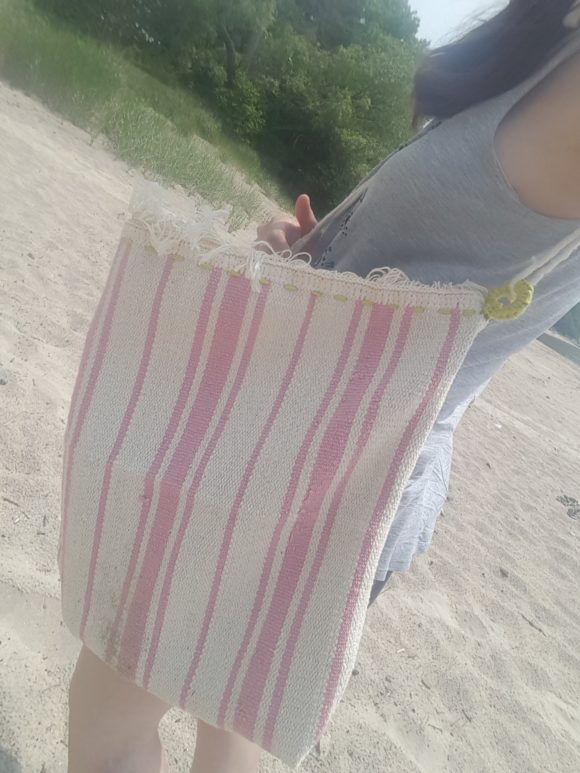
Instagram-ready shot of our new beach tote in use at a real live beach! Happy summer!
One of these totes would look cute made from a rag rug, too!
So what do you think? If you like this beach bag, please leave a comment. And if you plan on making one for yourself, go ahead and Pin it for later.
Have a great weekend!


