

A while ago I wrote a post on the 32 piece presser foot set that’s full of all kinds of cool feet to help you sew many different types of projects without going for broke. We love Amazon Prime at our house because we’re ‘last minute’ people. We run out of stuff at the last minute, we break stuff when we need it most; basically… we’re a family.
I recently noticed that the 32 piece presser foot set is no longer offered with Prime but still has free shipping when you spend over a certain amount (i.e., $35 in Canada). What is offered with Prime (thankfully) is my favourite presser foot of all: The knit foot.

This post is not sponsored by any brand of knit foot. It’s an honest review of my feelings toward this sweet little presser foot. It does contain Amazon Affiliate links which I make a small commission off if you happen to buy anything. This costs you nothing in addition and also helps support my blog! So thanks!
In the aforementioned post, I mentioned the knit foot and said it was my fave. This has not changed. It’s also the foot I tend to get so comfy using that I forget to watch for thicker seams and end up having to re-buy because the rubber foot can come off.
Yes, you can put the rubber foot back on, but I find that after the first time it pops off, it continues to do so. Maybe the next time it happens I’ll get my husband to brave the super glue for me (I don’t do super glue on my own, haha!), but I’ll admit I have rebought this a few times. I have a knit foot graveyard because as a result of rushing through my projects.
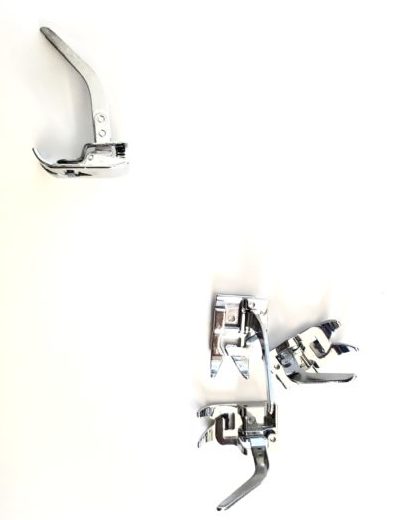
Top: Alive and well knit foot. Bottom: Dead feet, RIP.
Anyway I mention the above in honest caution, but not as a deterrent. It’s something the makers of the knit foot could improve upon. When you approach your thicker seams with the knit foot, sloooooow down. If it looks at all like your needle is getting closer to the blue rubber foot, that’s because it the rubber part is moving up AKA coming off of the foot. This is not what you want. If you’re not careful, the needle will thread through your rubber piece and havoc will ensue. Don’t let this happen to you.
The easiest way to avoid this is to ignore the fact that you’re sewing is going smooth like butter and anticipate any thicker parts, move slowly and carefully, and even guide your fabric through just at this point with your foot raised (you can sew over that bit with a different foot after if it looks loose). Be gentle, be kind, even with presser feet that have a minor design flaw.
You can also try using a hump jumper over the thicker seams, which I have, but admittedly have not tried with the knit foot just yet. Here is a video that gives an example of how you would use that.
Now that that’s settled, let me tell you…
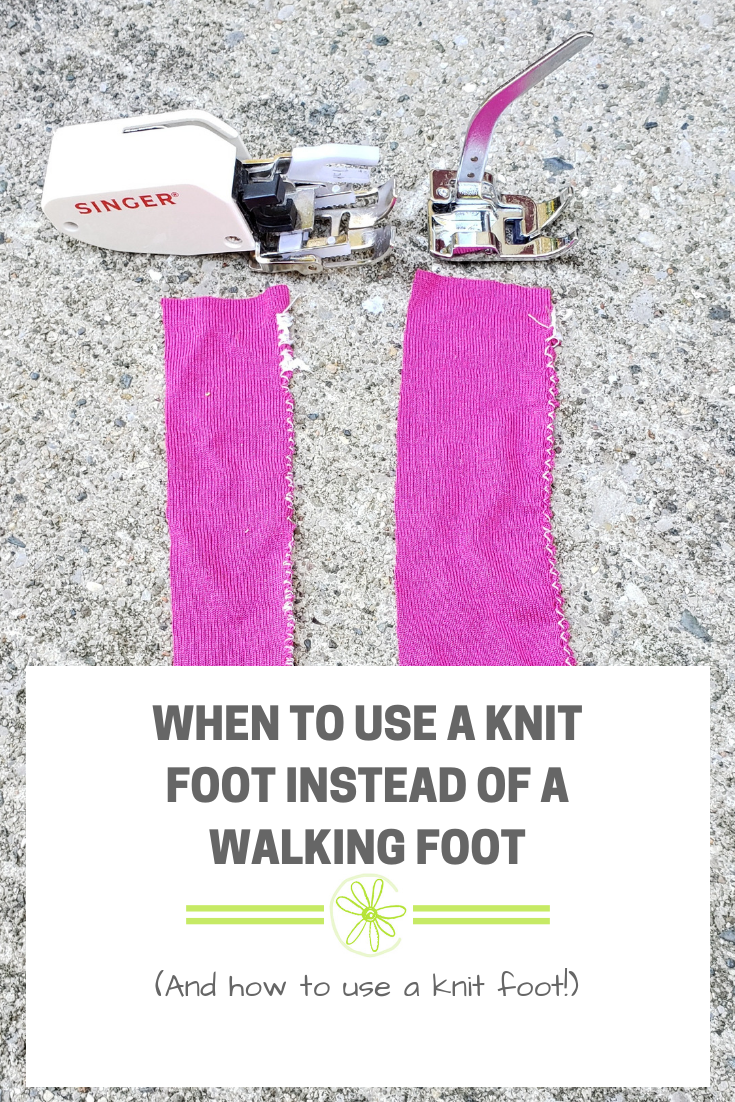
Why I love my knit foot more than my walking foot for knits
To those who have never used either, it may seem obvious to choose a knit foot for stretchy knit fabrics. I use mine most with jersey to make and finish scarves for my shop, to topstitch the hems on my upcycled tees, and other stuff for my family. But a lot of people who sew have never worked with a knit foot and their go-to is to use and recommend the walking foot, even when zigzagging over the fabric’s edge.
And here’s why I like it more than a walking foot:
The walking foot (or even feed foot) is harder to stitch over the edge of knits with, as they’re stretchy and the ‘teeth’ want to feed the fabric from the left and the right at once. That’s how it feeds most fabric through so smoothly.
If you’re doing an overlock or zigzag stitch over the edge of a fabric though, your fabric’s edge is in the center, just in front of the needle (not touched by the right teeth/feed dogs). And with a stretchy knit like jersey, things are more complex. The left teeth and feed dogs on a walking foot are likely to feed the fabric pulling toward the left — knit stretches the way it is fed, unlike a quilting cotton which will stay put mostly — since those right teeth and right feed dogs are gripping nothing.
The knit foot grips stretchy fabric right in front of the needle where you are zigzagging, overlocking, stretch-stitching, or whatever stitch you happen to be using. Your stitch goes where it should go, and it feeds smoothly through the machine with very little guidance from you.

Both sewn with one hand for video-taking purposes. Left side: Eek. Right side: Improved.
The walking foot is great for most fabrics, I find. Knits, however, especially lightweight knits, really benefit from being fed just in front of the needle.
Below is a little video showing you what I mean.
(I know, I’m a n00b. I shot it vertically because the only videos I ever shoot are for Instagram stories lately. Ack. I’ll do better next time. Anyway. Watch the video even if you skipped it due to its inferior alignment!)
So yes! Knit foot. It works especially well if you’re sewing without holding a phone to take a video, but hopefully you can see the difference well enough regardless.
Thanks for stopping by. I hope this post has been informative. If it has, please feel free to Pin it or share wherever you normally share great stuff! If you end up getting yourself a knit foot to try, or if you already have one, please let me know your opinion in the comments! I love mine (all of them, past and present, haha).


I have been looking for a Knit Presser Foot for a while here in Calgary, Canada and I could not find a place that sold them. I see them for sale on Amazon but it’s only from sellers from China and I don’t trust them. Where did you got your Knit Presser Foot from?
Typically I would agree and opt not to buy the ones from China. However, I love this foot and for it I make an exception. Usually I opt for the ones by “Honeysew” on Amazon which I have linked in this post. They take a bit longer than I’d normally be happy about, but again given the lack of local options… That said, the rubber grip part does come off over bigger seams so a hump jumper or Jean-a-ma-jig is helpful when using this foot. Happy sewing!
I’m just beginning to work with knits on an outfit I’m making from ITY. My machine is an old Bernina 717. Any suggestions for me? Thank you ☺️
This comment slipped by somehow, I’m so sorry! If you’re not done yet:
– Knit foot or walking foot, definitely.
– Stretch needles specific to your machine brand (or universal including your machine), a must. I prefer stretch needles over ballpoint now that I’ve had a bit more practice, unless I’m working with plain jersey.
– ITY was what I used for one of my first tops, and it was frustratingly slippery but wow… the result is so worthwhile. Patience… even though I personally don’t have any. :’D
– If you have a steamer, use that rather than an iron to press because the fibres can melt with an iron. If using an iron, use a pressing cloth or thin cotton fabric between the iron and the fabric you are using.
– Lots of clips or ballpoint pins. I like clips for fast work but pins work better overall I find.
– If your machine is not guiding your fabric through at the start or if it sucks the fabric into the needle plate, a bit of tissue paper under the presser foot will help guide it through smoothly, and you can just rip it off afterward.
Good luck on your make! <3