Hi! I’m here!
It took 3 weeks, but we now have internet. It’s cellular and has upload and download limits from 2002 but, luckily, Bell Fibe internet is coming to our street. We’ll be kissing these cellular butts goodbye soon, with any luck, and for a ridiculous cancellation fee that — unfortunately — will be totally worth it.
Yesterday morning after the husband and son headed off to the farmer’s market, I had some strange inspiration. Since moving in, plastic bags have had no place. (This is true in our environment, too, which is why we should always remember our reusable bags when shopping.)
We had a little plastic corral that the previous owner had installed in the front closet of our last house, which worked well. Years ago I had a fabric one from the dollar store. I live nowhere near a dollar store right now, however, and the car was with the boys, so I decided to make one!
It was very easy, and would make a good beginner sewing project if you’ve been gearing up to try out a new sewing machine.
Materials:
- Cotton fabric of your choice (pre-washed and dried)
- Sewing machine & thread
- Scissors
- Pins
- Ruler
- Shoelace/elastic/ribbon to cinch the top hole
How to make a plastic bag holder:
Start with a rectangular length of fabric. Mine was the remainder of a fat quarter used for another project a couple of months ago which I will post about later! It was about 18″x9″.
If you cut off any fabric, be sure to save enough remaining fabric to make a loop later. (You can also use remaining fabric for a number of other projects, so keep your scraps!)

Fold rectangle lengthwise in half, right side in. Pin almost all the way along the long raw edge.
Fold back one of your shorter ends on each side so the right sides are facing out. Pin all along the edge. So far, you’ll be sewing two sides, leaving a hole at the end to pull right-side out later on.
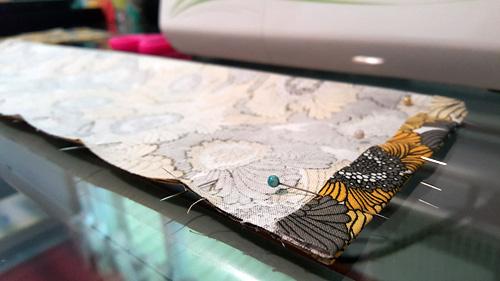
On the long, raw edge, zig-zag/overlock stitch as in the bottom-right picture, leaving a few inches unstitched at the end. I used this stitch so that if I wash it later, material will not fray.
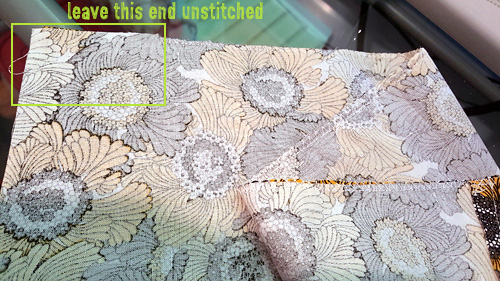
Straight stitch along the shorter folded back edge. Since your fabric was folded back and the raw part will not show, no worries about fraying. Two sides are now sewn!
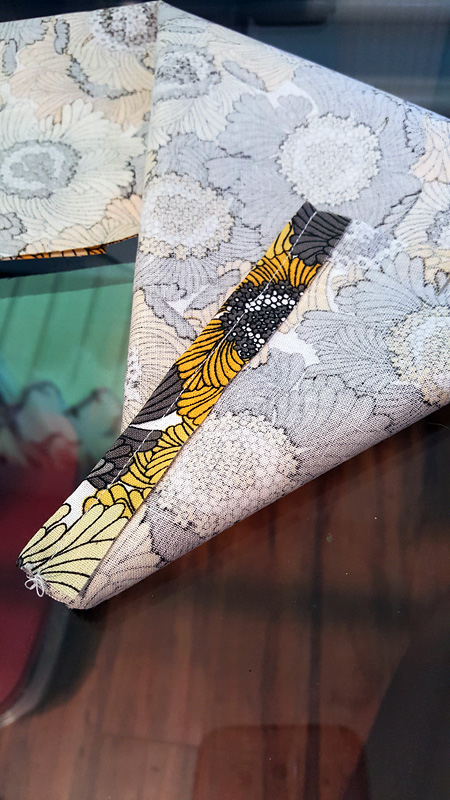
Stitch diagonally across both corners on the straight-stitched side. Snip off the ends. This will allow your dispenser to have a flat bottom instead of looking something like a tall boot.
Toward the bottom somewhere on the folded long edge (OPPOSITE the long edge you sewed), make two small cuts a few inches apart. Mine was 2″, but I think I should have done 3″. Do 3″. 🙂
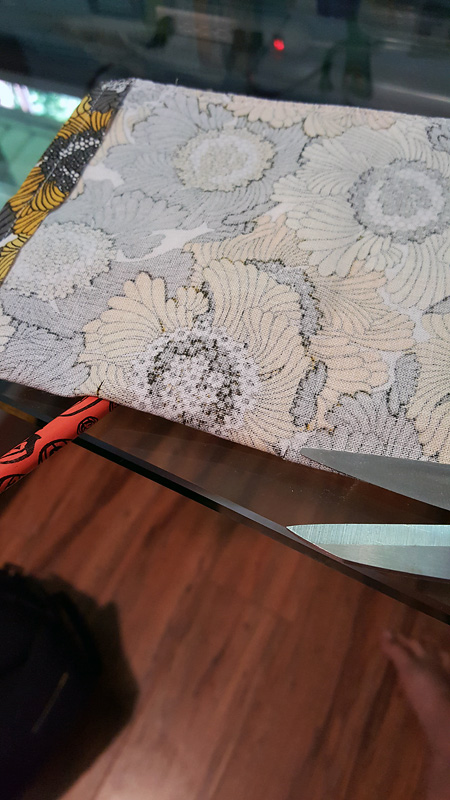
Slip scissor blade into one of the cuts, and snip from that cut to the other, making a hole — the very hole from which your bags will be dispensed! After a few minor adjustments of course.
Fold back and stitch each side, like so. [IMPORTANT: Make sure you pull back the other side so your sewing machine doesn’t catch it, rendering your hole a non-hole.]
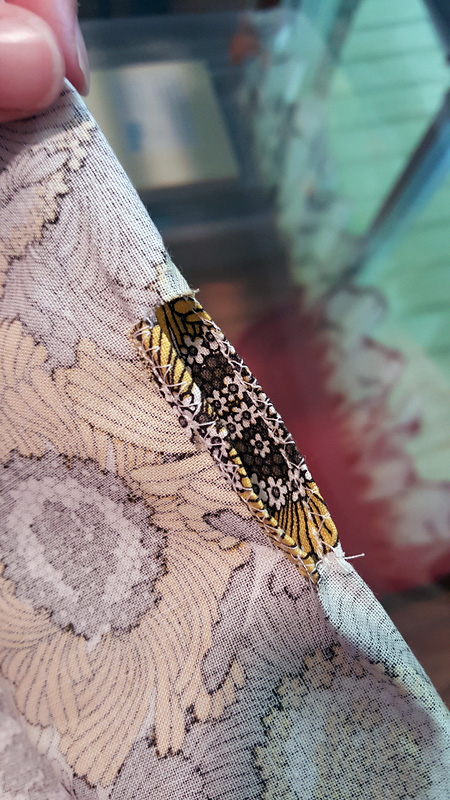
To finish, straight-stitch diagonally across each end and snip off the excess.
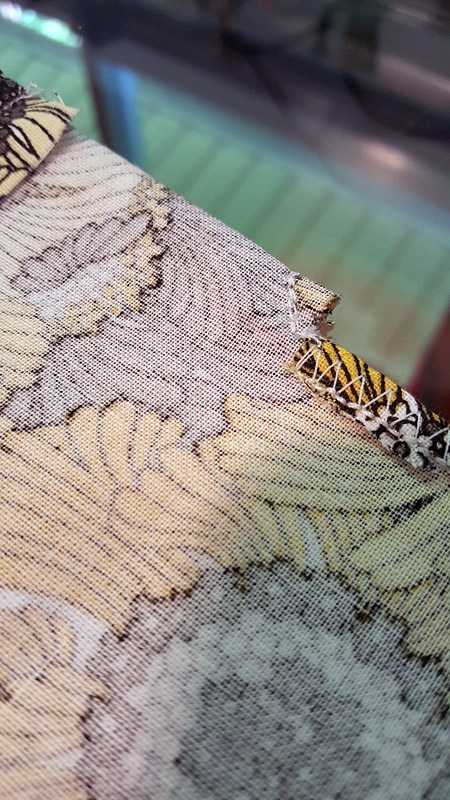
Cinching the hole where you’ll insert plastic bags:
If using elastic [if not, skip this part]: At the open top of your bag holder, stitch one end of the elastic to one of the unstitched edges as pictured below. Leave extra fabric above, as I did. For the length of elastic you need (unstretched), measure and cut as long as the folded width of your fabric. I used approximately 4.5″. Leave the rest of the elastic unstitched for now.
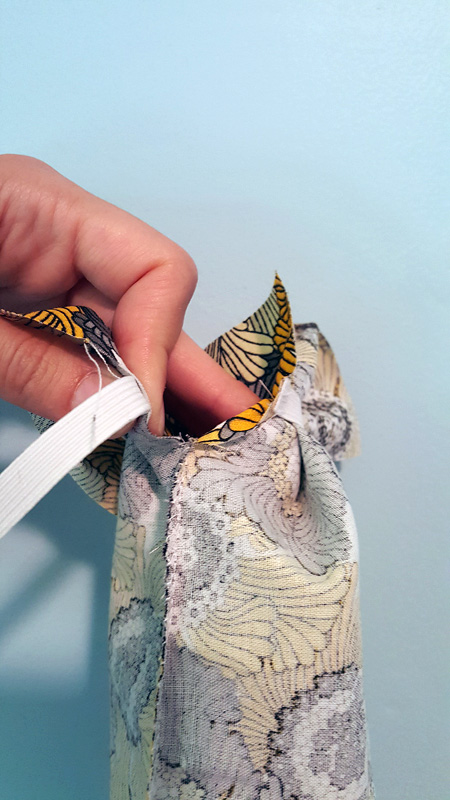
First end stitched on, I am pinching where the end of the elastic will be fastened later. You can also see how you’ll fold fabric over the elastic to make a sleeve next.
If you are NOT using elastic, use a longer length of shoelace/ribbon so you can cinch and tie into a bow later. Pin one end where my picture shows you’d have fastened the first elastic end, leaving the length unpinned.
Now you can create a sleeve for the elastic/shoelace/ribbon.
Make a few downward snips into the open end of fabric (but do not cut through your cincher). This creates flaps to fold over your tie/elastic one at a time. You’ll then sew below your cinching material by holding the tie/elastic to the top of each fold as you go. (DO NOT SEW OVER THE CINCHER. It’s bad!) I used zigzag to make the stitch more obvious for this post, but you can use straight stitch if you like.
Before sewing the final flap down, be sure to stitch the end of the elastic to the fabric where shown in the last picture. (Don’t do this for shoelace/ribbon.)
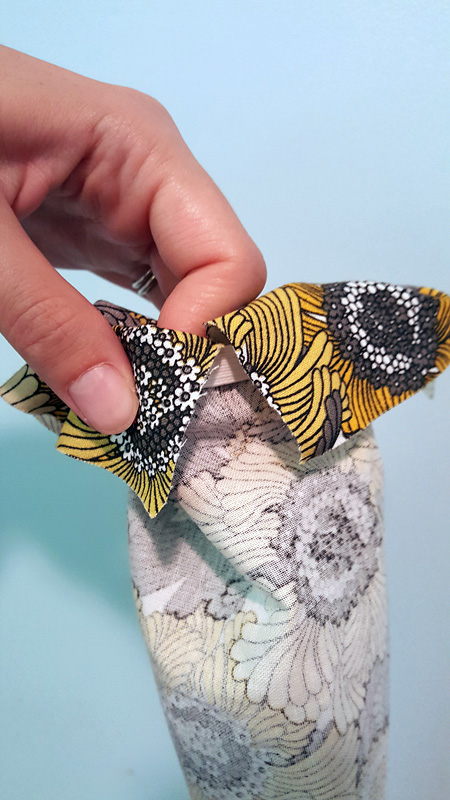
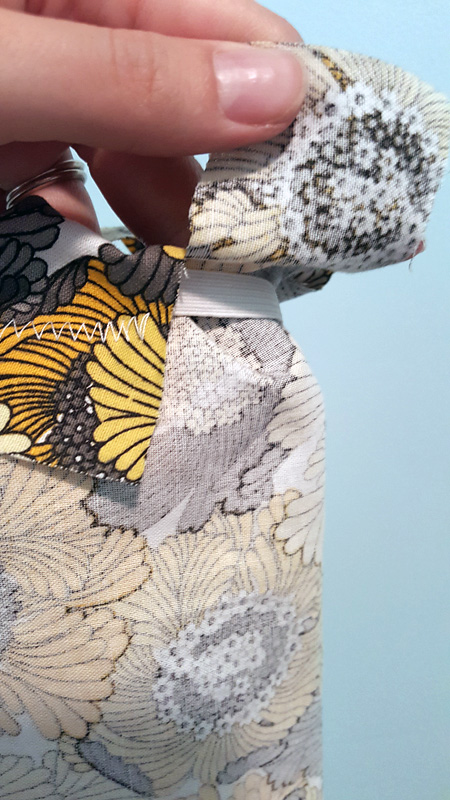
This came a little close. Do NOT sew through your elastic/shoelace/ribbon. Hold it firmly to the top of the fold as you create your cinch sleeve and sew well underneath.
When you get to the other end, congratulations! You’ve made a sleeve for your cinch!
If using shoelace or ribbon, unpin and pull so both ends of it are even and hanging out for tying.
Turn the dispenser right-side out and roll out your seams until flat! TA-DA! Almost done.
If using elastic, roll the last bit you stitched down into the dispenser a little for looks.
Creating a hanging loop:
Using a fabric scrap as mentioned earlier (matching or otherwise), cut to a strip about 5″. Face right sides in, stitching along the raw long edge, then pull right-side out. This is easy to pull through using a crochet hook, but a chopstick or pencil can help too.
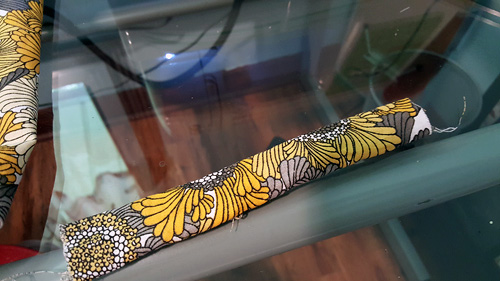
Here is the tube created to make your loop.
From here you may fold it over one more time and topstitch just for looks, or you can leave it. Make a loop by crossing on end over the other and carefully stitching across with a zig-zag.
Stitch the hanging loop onto the top-back of your dispenser carefully. [I keep saying “carefully” because it gets thick, and when I did it my needle spontaneously broke and shot left into and through the cushy part of my middle finger at a speed I never knew possible. Infection is pending.]
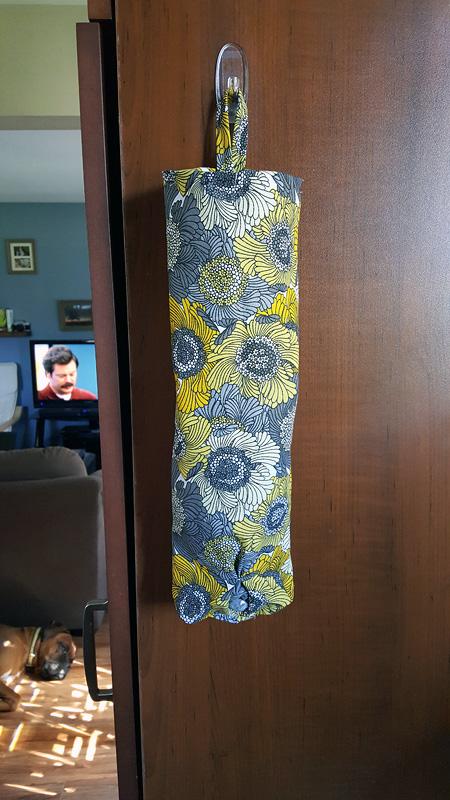
(Make sure you’re watching Parks & Recreation so you can get a final shot like this one. A worn-out boxer dog completes the image.)
If you’ve used a shoelace or ribbon, cinch the top and even tie a little bow if you like. Now, stuff it! With bags.
You did really great. Hopefully my instructions and photos helped the process. I’d love to see a shot of your fancy new plastic bag holder, so please leave a link in the comments!


