

Well, I recruited the husband for yet another DIY. We’ve had our beautiful headboard for a week now, and I’m in love. (With husband, yes, but also — the resulting headboard.)

Click image to see large.
Money-saving tip:
Someone you know is going to have a spare everything when it comes to tools and supplies. Ask around. You will save so much money just by using things people weren’t using at the moment. They’ll probably be happy to let you use their stuff, too. Between Miklos’s dad, his brother, and my dad, we usually find most of the stuff we need to make our projects.

So here’s the stuff we used.
Had on-hand/borrowed:
- About 5-6 different types of clean pallets
- Sawzall to cut the pallets apart (prying will split the wood)
- Power saw for trimming boards once on the frame
- 1×2 pine board for the framing (you can get this at Rona or use pallet boards if you’re handier than we are)
- Leftover 2×4 from a previous project for headboard’s legs (not needed if you want to nail your headboard to wall)
- Power sander
- Thick cuts of styrofoam (we used ones from an old electronics box) to pad the back corners and protect the wall/pad the feet for floor protection
Bought:
- Some different sized nails (1″, 1 1/2″, 2″) — $4
- Sandpaper refills for the power sander — $5
- 1 can of stain in Espresso — $14.98 + tax
How’d we do it? I’ll show you in pictures.
Reminder: Since I’m not going into extreme detail here, (highly customizable project) take exact measurements and use the right sized nails for each part of the job.
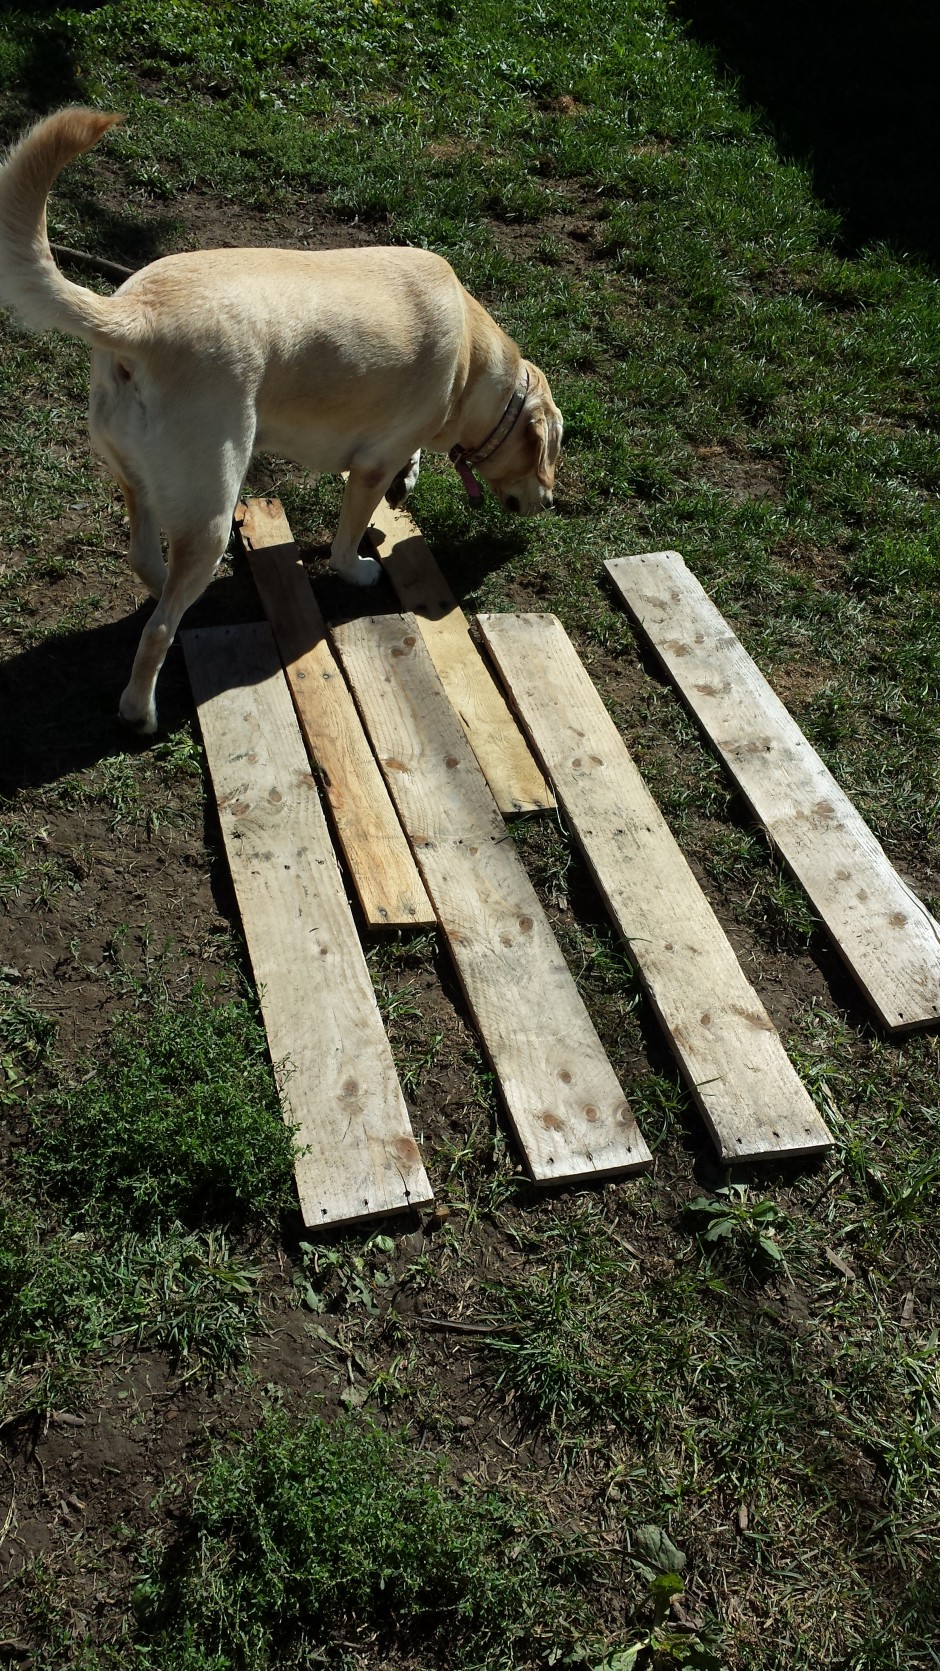
Casey was our supervisor on duty.
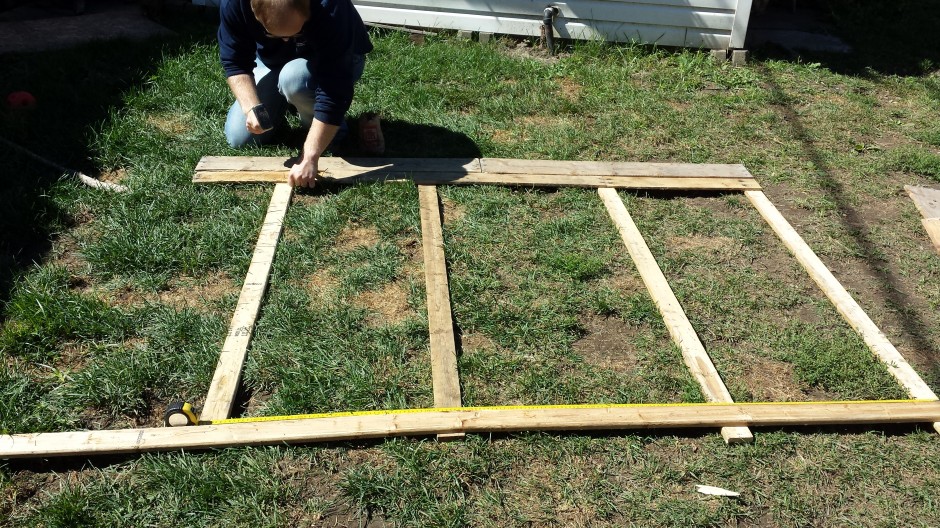
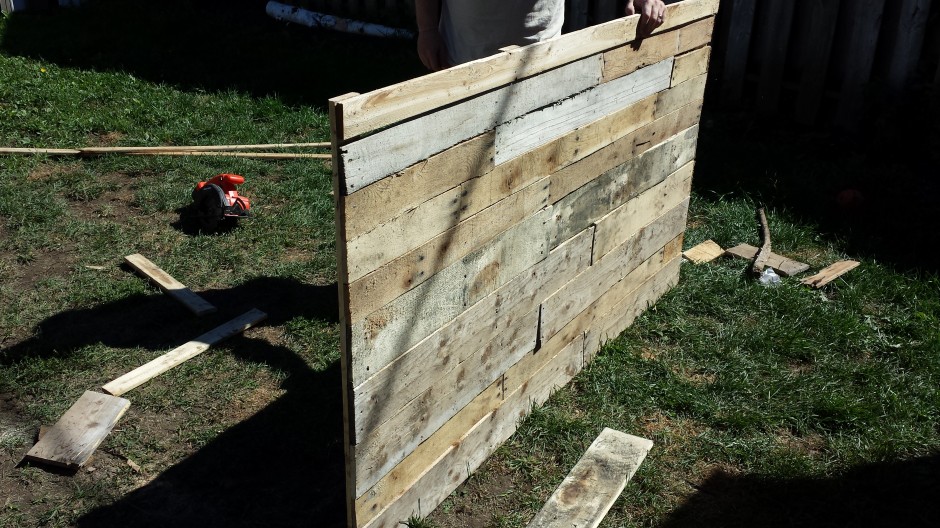
The headboard has hereby been framed.
Trim down the sides with a power saw. We elevated the headboard so we didn’t cut into the ground.
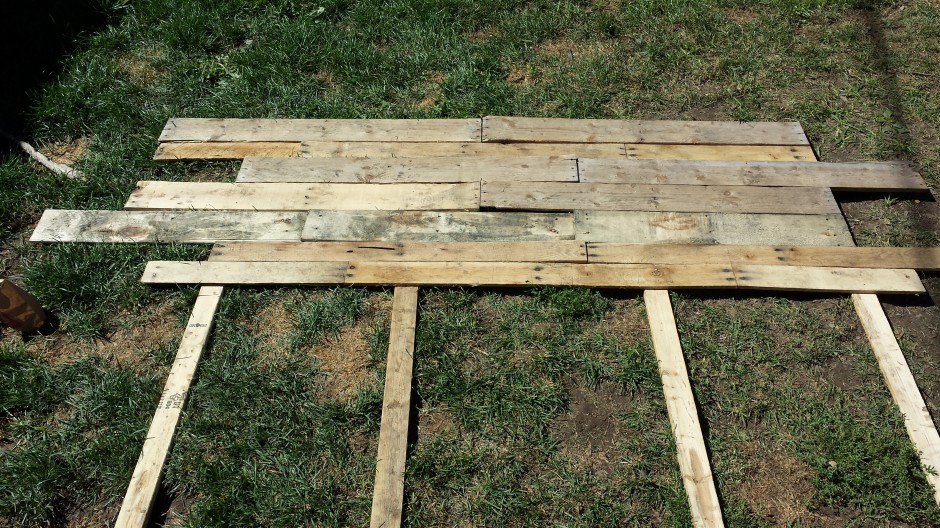
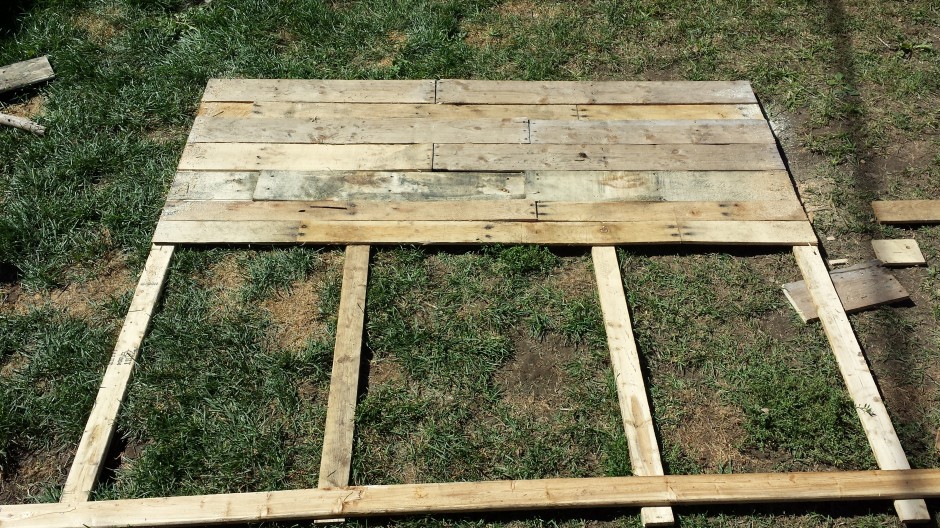
It’s beginning to look a lot like headboards…!
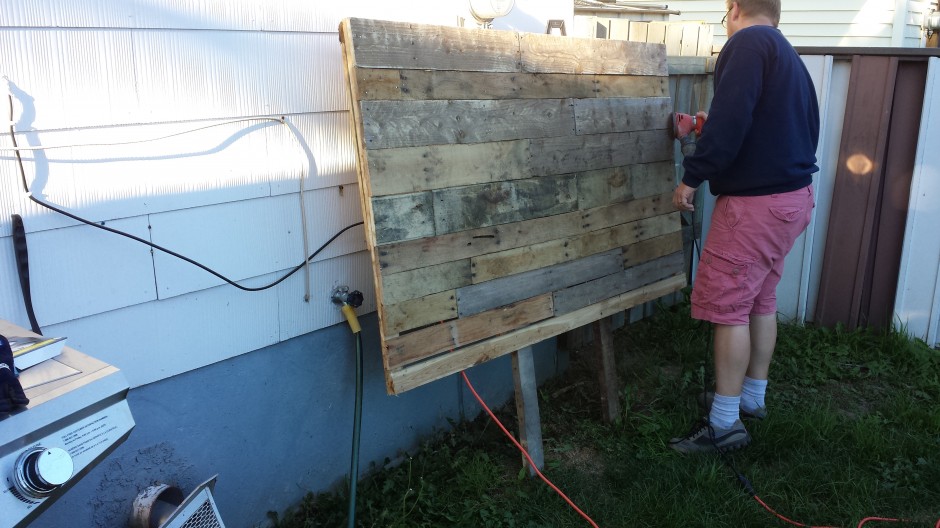
We nailed some 2x4s to the back and reinforced them to make some sturdy headboard legs. Things are starting to take shape! Sanding ‘er down to avoid slivers.
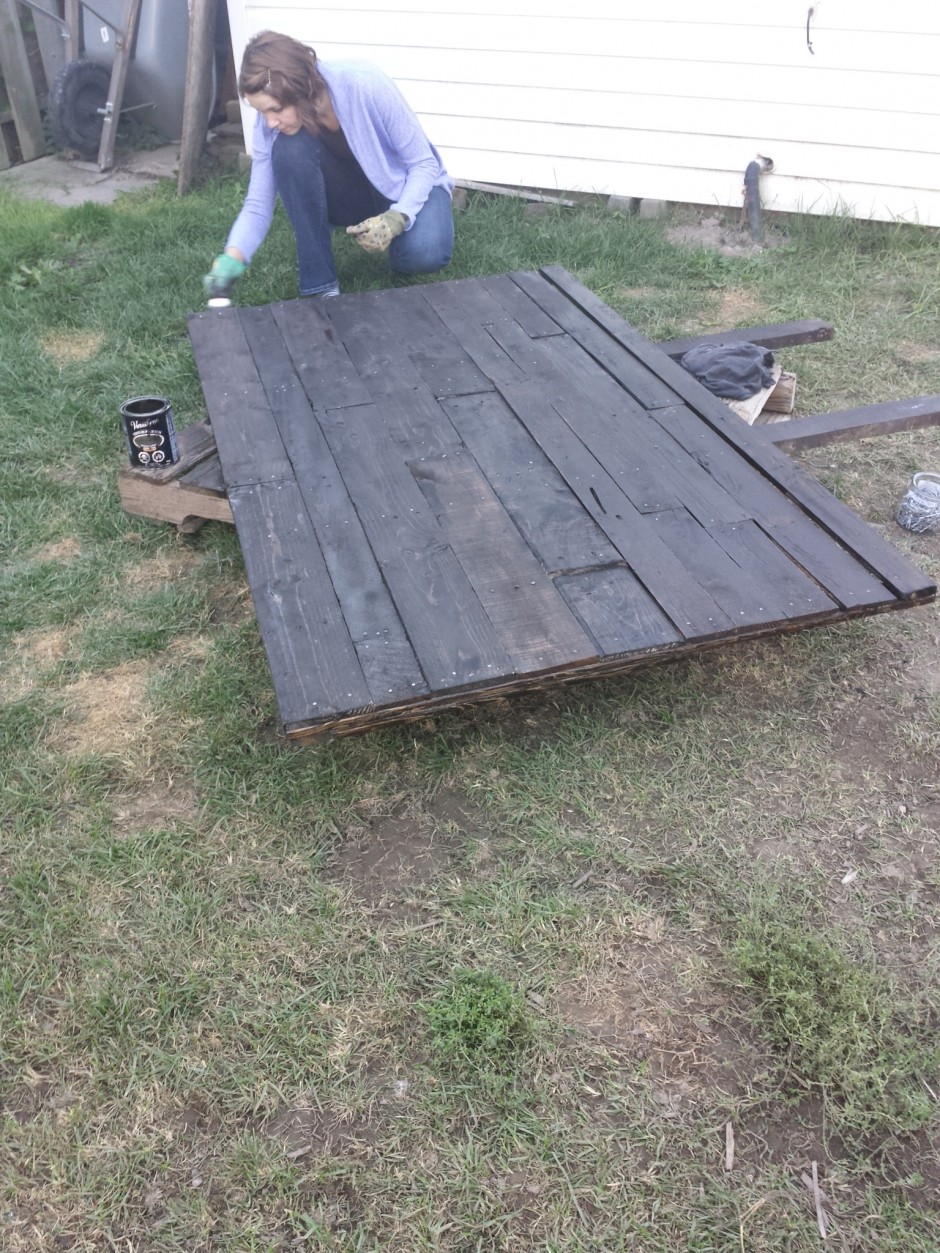
Used an old t-shirt as a rag and dabbed and wiped, dabbed and wiped. Mmm, fresh air is good during staining.
Let that dry a few days. It would probably not take as long if it hadn’t been suddenly cool and damp outside afterward. We had the headboard in the shed to dry.
Once dry, we cut some styrofoam pieces and nailed them onto the back corners and legs — any bit that will be touching the wall. (Forgot to take pictures… sorry!)
We even found some perfect leftover foam pieces that worked like slippers for the bottoms of the legs. Hooray! No scratching!
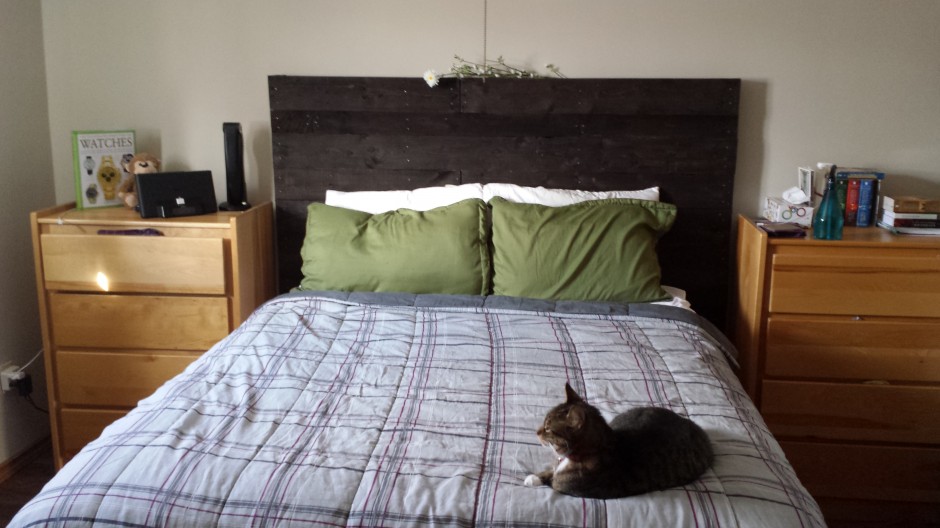
Rico likes it too.
I’m very happy with the way this project turned out, and even happier that it looks so neat but cost so little.
Have you made a pallet headboard? Share it in the comments!


Pingback: DIY: From Old Dresser to Pretty Vintage Bench | commatose.ca
Pingback: DIY rustic end table for less than $10! | commatose.ca
Pingback: 80 Wood Pallet DIY Projects | Rilane - We Aspire to Inspire