

If you have access to a sewing machine, you can turn some spent old jeans into skinnies.
I mean, it’ll probably turn out better if you have some sewing experience, but given that I did this as one of my second or third sewing experiments ever, I’m proof positive that it can be done.
Background: I don’t mind jeans with a wider leg, but in the dead of winter, I love to wear my boots. Wider jeans + boots just don’t work together very well. Bonus: These were maternity jeans. If I didn’t like the way they turned out, I wouldn’t need to deal with the result for much longer. (Spoiler alert: They turned out even better than I’d hoped!)
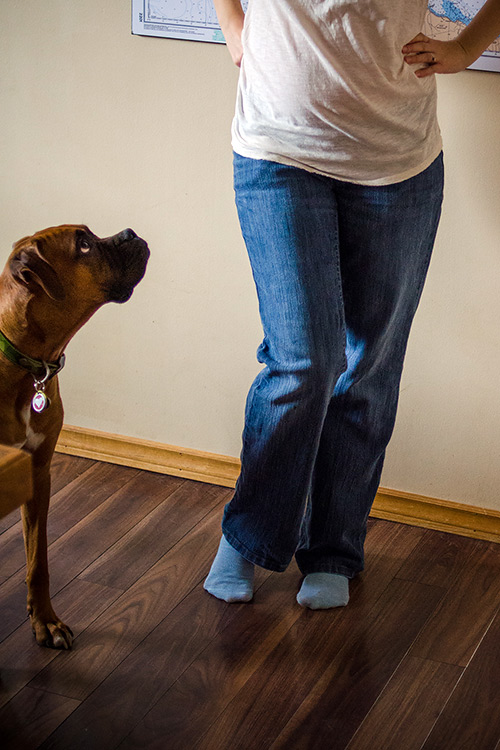
“You know you’re going to have a hard time stuffing those into your boots, right? Especially now that it’s hard to bend over with my brother growing in your belly?” Thanks, Junior.
New maternity jeans can be expensive! Luckily, I already had this pair, so the next logical step was to make skinny jeans out of this pair.
Sorry, I did not take any pictures of the many “ARE YOU KIDDING ME” moments had during this experiment gone eventually right. Tip: If this is your first time sewing, go slowly and carefully over those folded-over hems at the cuffs and crotch. It will save you some agony. Also, use a sharp needle made for heavier material like denim. Google the right one for your machine.
So here’s how I did it. And if you find this tutorial helpful and you decide to do it on your own, please leave a comment! I would love to see how yours turned out.
Just so ya know, this post contains affiliate links to products I’ve tried and now trust. Any purchase you make earns my site a small commission and adds nothing to your purchase price. It’s win-win! Now let’s get skinny-jeansing!
Materials:
- Jeans
- Safety pins
- Pen/sewer’s chalk
- Sewing machine
- Coordinating thread
Optional Materials:
- Extra heavyweight needles like these (just in case, because you never know — always have these on hand)
- Patience (I used very little of this, personally)
How to Make Skinny Jeans:
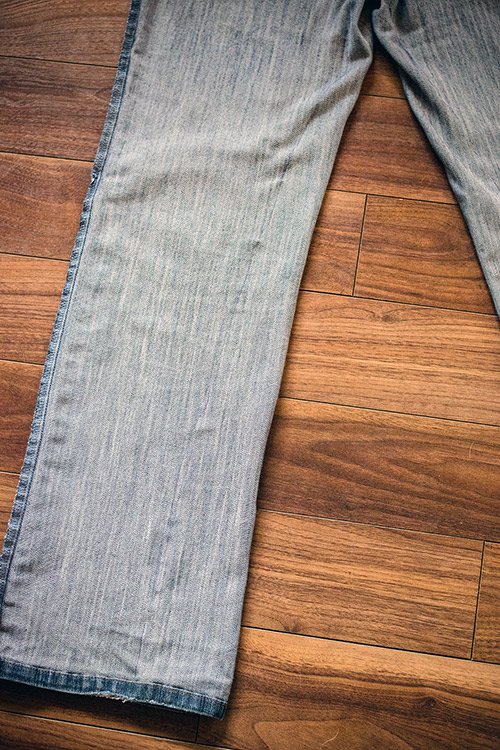
1. If you have a pair of skinny jeans you already love, use their shape as a template. Turn them inside out, and turn the pair you’re about to sew inside out too. Line up both pairs along the double stitched (outer leg) side with your wider-legged pair on the bottom.
If you don’t have a pair of skinnies you want to use as a template, don’t worry! With your jeans turned inside out, skip to Step 4.

I aligned these better after I took the picture.
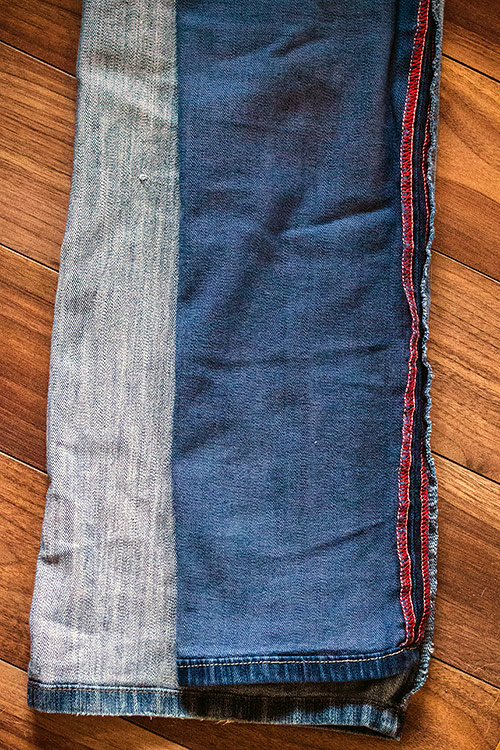
Outer leg edges aligned.
2. Trace a gradual line with a pen or chalk from outside your skinny jeans onto your soon-to-be-skinnies. I used pen. I am not very fancy.
Be sure to press both pairs of jeans down as you do this so they don’t move out of alignment. You could also use little crafter’s clips from the dollar store or even paper clips if you’re gentle (they break easily for heavier material, for me anyway).
Important: Be slightly generous with tracing — give yourself a seam allowance.
Don’t trace the line exactly on the edge of the skinny jeans, because it’s better to have more material to work with than too little. If they’re too big you can readjust later. If they’re too small, you’re usually out of luck.
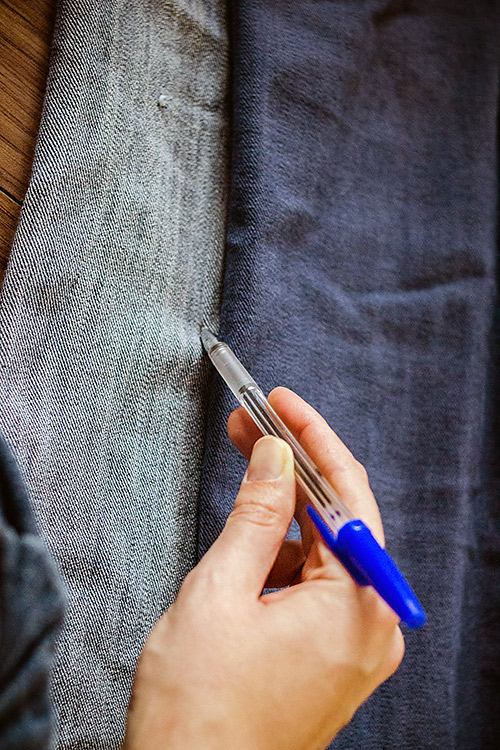
Voila. Faint pen lines are on. Ready for the next step!
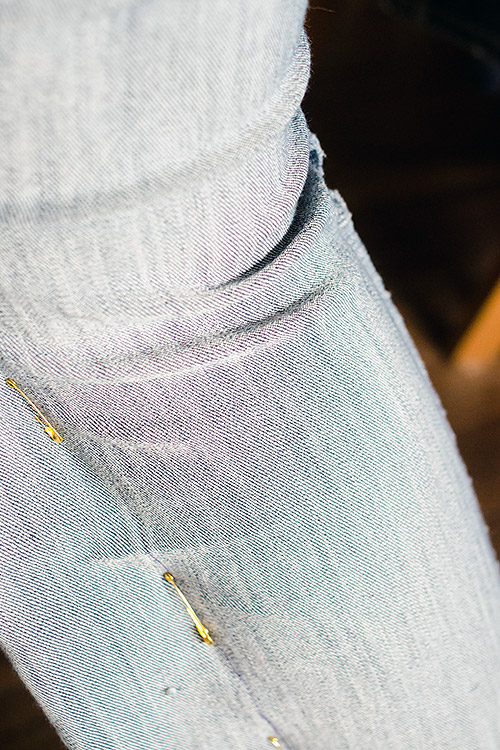
3. Note: Use safety pins instead of straight pins for this step, unless you’re feeling masochistic.
Pin vertically about 0.5 cm outside the pen/chalk line (on the inner thigh/calf side of the jeans). This will allow you to try the jeans on for fit before you start stitching.
The bit of space (i.e., 0.5 cm) away from the line will allow you to not stitch over the pins and break a dang needle.
These jeans were quite baggy on me to begin with. Your pins may only go up to the knees if you’re using a pair that are straight leg or bootcut.
4. Try them on. If they’re too loose or too tight, adjust safety pins into a suitable, comfortable line close to your leg. I like my skinny jeans very skinny. These were stretchy pants, so I wasn’t afraid of them being a bit closer-fitting. Use your better judgment depending on the stretchiness of your material.
They look great. Let’s leave them like this.
Readjust pins as necessary while they’re on you if you like them looser or tighter.
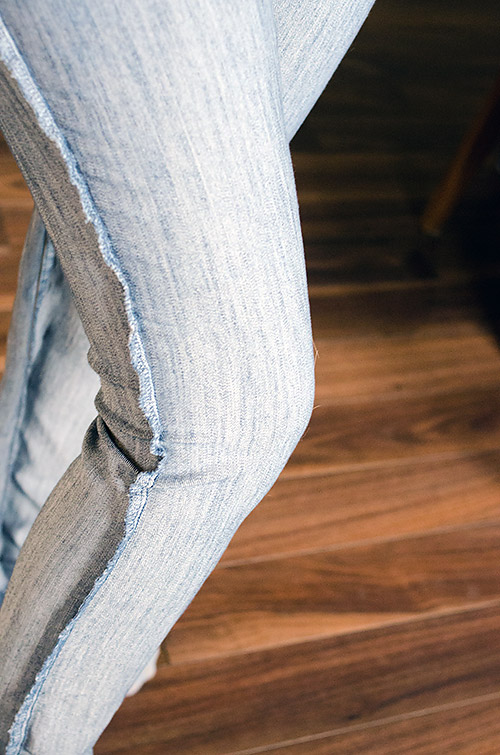
This gives an idea of how the shape will look after they are expertly (ha!) sewn. Ignoring the dog hair on my knee of course.
5. Take jeans off (and replace them with others in case someone comes to the door). Using a straight stitch, sew inside the line of pins — near or on that pen line you drew earlier, if it’s still valid.
If you need a lesson, it’s best to have someone who knows what they’re doing around you. I got a crash course from Miklos before I started to sew (that’s funny for me to think about now) — his mom is a great seamstress, so he knew a thing or two from her.
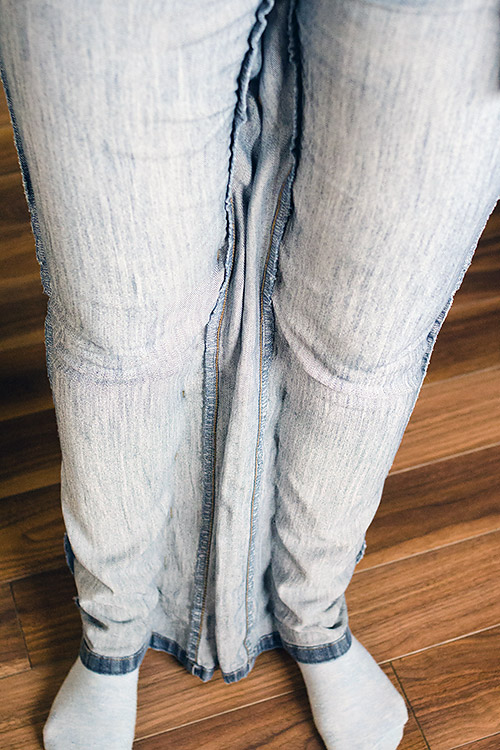
6. See this masterful line I stitched? Remove pins like I did in the above picture.
Cut off the excess (the inner flap of denim that your legs no longer go into), leaving about 1-2 cm excess for the next step. I left 2 cm because I was a newb and needed all the screw-up room I can get. No shame in that. Besides, turns out years later — finally knowing a bit more about what I’m doing — having extra room to start is better.
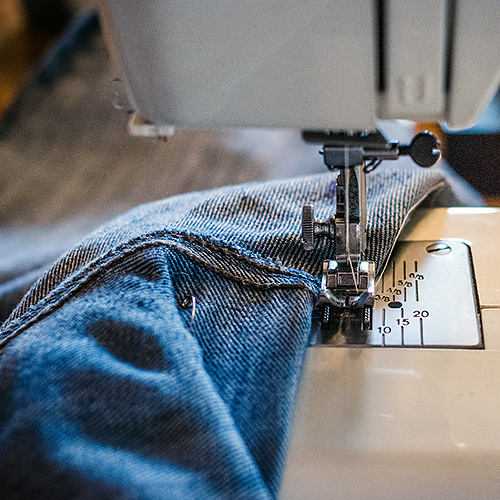
7. Now you’re going to put these jeans under the needle for one final step.
Use a zig-zag or overlock stitch (or serger if available) right to the edge — all down that side you just cut off. (Observe the stitch in the flap pictured above, sewed professionally by the underpaid person who originally made these jeans.) The zig-zag, overlock or serger prevents fraying, and your pants have an extra line of reinforcement so you won’t accidentally split them when you go out shopping.
8. Carefully, not cutting into any stitches, trim off any excess that may bother you later.
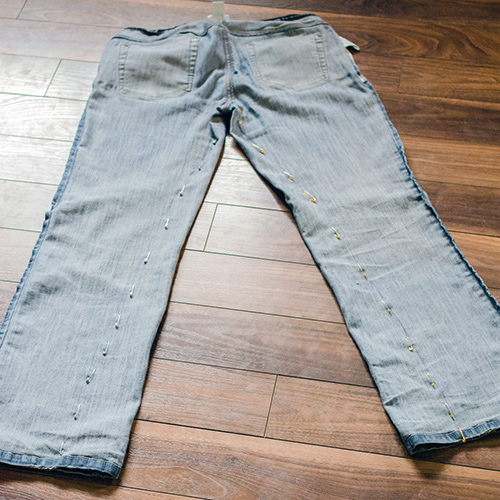
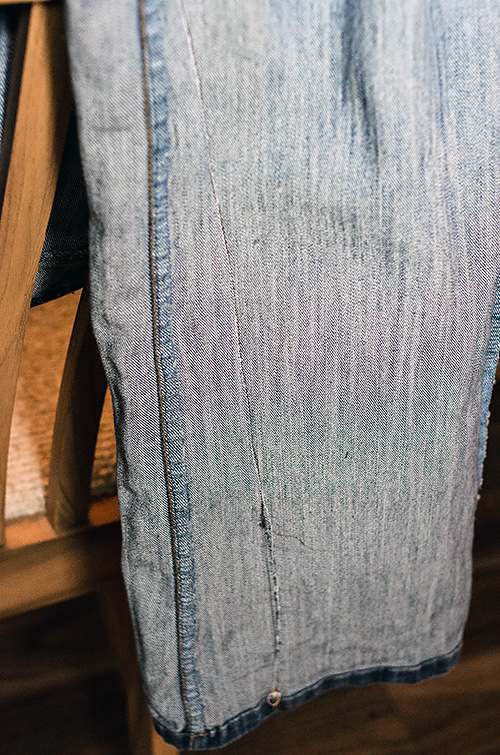
You’re done! Try them on! I hope you love them like I loved mine.

Yay! Boot-ready jeans, shown here without boots, just so you see that I really did make them into skinnies.
Note: If they’re too loose, you can turn them inside-out again and stitch a little closer to where your leg will be. No need to reinforce-stitch again or cut anything else off, unless it’s excessive.
I hope this photo-instructional was helpful. Feel free to Pin it using the buttons below if you want to use it later, or if you think it could benefit someone you know!
Be sure to check out some of my other DIYs:
- DIY an ugly old dresser into a pretty vintage bench
- Easy, quick DIY burp cloths — great quick baby shower gift, and they last a long time!
- DIY bra band extender for pregnancy — a true life saver for me
- DIY knotted hipster hats for baby
Have you made regular old jeans into skinnies before? How’d it turn out? Let me know in the comments!


What a great idea! Here I was, ready to go on a shopping spree with 5 to 6 jeans in my closet that I haven’t even worn. This saves me a bundle. Thank you.
Happy to help! Enjoy your semi-new jeans then. 🙂
Hey, thanks for the tutorial!
I’d never tried this before (despite some sewing experience – I think because I dislike hemming jeans so much), but this gave me the push to try it – and I will do it again.
Now I’ve got a pair I can wear inside my boots AND I’ve got the fit of my favourite boot-cuts in the hips & waist. Pretty happy about it 🙂
Glad you liked it!
That’s true. The way some skinnies tend to feel on the hips and thighs is a very good reason to upcycle some with a fit you already love. I’ve bought too many skinny jeans I did not end up wearing because of the binding. Eeek!
Thank you for the comment.
Could you tell me how to lengthen coloured jeans with another pair, please. The jeans I bought were out of a charity shop, and I thought I only had to let them down a bit, but when I got home there was nothing there to lengthen, so I bought another pair, nearly same colour,not quite, but then who looks down at bottom of your jeans..the legs of the jeans were a 27″, I’m a 31/32″ leg..have you ever tried this before?
Thanks
I have not, but that’s a great topic! I think what I’d do is treat the second pair like adding on a cuff of denim. It would probably be easier to explain with pictures and I’m a bit under the weather today to take any, but I found a few different options for adding a denim cuff to lengthen jeans when I searched Google. I’ll do a post on this when I’m feeling a bit better. 🙂
I have used a sewing machine for years and have looked at a lot of tutorials and I have to say you have one of the easiest to understand. I would not have known you weren’t a seasoned seamstress. Thanks for sharing.
Wow. What a compliment! Thank you for your kind words. I’m glad this made sense to someone other than me. 😀 Thanks for stopping by.
Buenísmo! tengo un montón de jeans para transformarlos.. very thanks
You’re welcome! Glad to help!
I have a question! First of all I’m a curvy girl and I have a pair of dark blue jeans that I’m wanting to try however the inner seams are those decorative type with the light stitching so I’m wondering if there’s a way to do this while still using that decorative part? Im not a very good seamstress like at all, so I wouldn’t know how to make it on my own. It just send that it might look funny having no light stitching on my lower legs but then there it is on the upper and crotch? Does that make any sense at all?? Lol
Hah! It makes sense, yes.
You could do a dabbing test on an obscure part of the decorative stitch to see if a matching Sharpie would blend the stitching in with your denim. I’ve Sharpie’d countless things with success. If it blends well enough to make the stitching not stand out after, you could probably pull it off.
You could also just trace and only cut off/re-stitch the outseam and leave the inseam in tact. I’m not sure how that would feel as far as fit though.
Great tutorial! This fixes all my hand-me-downs that never quite fit. I don’t have a machine but I have a needle and thread so if you have any tips on how to handle that situation then please let me know!
Thank you! My hand-sewing skills are not phenomenal but if you come up with something that works, I’ll be happy to share it! The best I can suggest is stitching a bunch of X’s then a straight line… This is why I like my sewing machine, haha.
Great easy idea. I had just took mine in, but just winged it. I have some more tapered jeans I will use to take in my baggy pants. So thanks for sharing.
Thanks Donna! It really is easy. It makes for great practice for those (like me) who hadn’t much sewing experience beforehand too. Happy jeansing!
Have you always seamed the inside hems? Most of the tutorials I’m finding actually suggest altering the outer seam. I have noticed looking at a ton of pictures that sometimes the double hem is on the outside and sometimes it’s on the inside. Have you found that the double hem can change which seam you use? Have you noticed the shape working better inside versus outside? I could see it feeling like you have extra material in between your thighs if the jeans were really wide. Thanks for any suggestions you may have (before I start haha)
Great questions! You could definitely do the outer seam instead. My only concern with that was the chance of the outer thigh poking out a bit too much on the outside seam for my liking if I hemmed it wrong (or screwing up the hem/doing it unevenly on one side and it drawing too much attention to my hips or thighs etc). Easier to hide an amateur seam on the inner thigh and I was just starting out sewing when I wrote this. 🙂
I have done it just this way and I find it feels similar for shape and comfort as all my store-bought skinnies. It didn’t feel bulky once the excess was cut out but maybe it would if they were a stiffer denim. I had not considered that!
I have a few pairs of skinnies with this similar inner seam though so I may just be used to it.
If you try it the other way be sure and let me know how it works out. I hope this helps!
I was just going through my drawers and I have many pairs of flared pants that are so out dated. Why did I not think of this???? And I am even an accomplished seamstress! ONe question though, can I use this exact process even though the flares are on both sides, or will I end up with half a bee bell bottoms? Suggestions??
In the case of bellbottoms or flares you can do pretty much the same thing but you may want to trace the shin/ankle part of the skinnies on each side. If you feel like the grain of the denim will look strange and skewed you can wear them inside out and repin with safety pins until the grain sits right, if you know what I mean? If you know what you’re doing (more so than I do I’m sure!) you will probably have the eye for what I’m talking about and be able to pull it off quite nicely. I want to draw a picture of what I mean… maybe that’ll be a skinnies 2.0 post using flares! Haha. Thanks for your comment. Hope I helped? We’re on the road (I am a passenger) as I type this but i can clarify later if needed!
Thank you Thank you. I will be doing this to lots of my jeans that are just too baggy in the leg. Love the boxer in the picture, we’ve had 4 boxers, best breed ever.
Oh they’re the goofiest dogs, and very sweet. Our Junior is just growing out of the puppy phase and he’s almost 3, already has white whiskers though. Haha. And you’re welcome. Glad to help! Hope you like your ‘new’ jeans!
I love this but what if the double stitched side is on the inside?
You could trace, stitch and cut away the outside seam instead, after lining up the inner legs of your wider and already-skinny jeans. Basically same instructions follow, but try to stop stitching before the legs join the bum and avoid stitching or snipping into pockets.
You can also just do it this way regardless of that inner double seam The inner seam requires less precision I think, and many jeggings have this look. If you zigzag/overlock stitch it shouldn’t come apart.
Hope that helps!
great tutorial! Thank you for sharing.
Thanks for reading! 🙂
Great tutorial, especially friendly for the newbies! Please note that most Singer brand needles only work for specific machines, so be sure to check the manual or back of the package. The wrong needle can damage your machine. Other brands will label a heavy duty needle as “denim”, “14” or similar. Also, hammering the thick seams (crotch, hem) before sewing will make it much easier to machine/hand sew and less likely to break one of those snazzy needles! 🙂 (I’m an experienced sew-er. lol)
Great tips! Thank you! I’ve become a lot more familiar with my machine (thankfully) since I posted this. There is definitely a lot to learn before you dive in!
Great article.I am so happy to find this at the perfect time. Your pup is adorable !!
I’m glad to help! Thank you! <3
Great! Easy to follow too. Sarah x
I’m always relieved to hear that something I wrote was easy to follow. Thanks! 🙂
That’s a lovely project and the ideas of upcycling old clothes is much better than just throwing them away. My sister will love the idea, she has few old pairs of jeans that will look gorgeous as skinny jeans. Thanks for the idea!
Thanks Tiffany! That’s how I feel about it. If they still fit and you like the colour you might as well rework them. 🙂
Pingback: Own too many jeans to count? You’re not alone. Here’s how to give old jeans a second life. – Top Posts Ever
Pingback: Own too many jeans to count? You’re not alone. Here’s how to give old jeans a second life. – Viral Hit List
Pingback: Own too many jeans to count? You’re not alone. Here’s how to give old jeans a second life. – Mostviral
This tutorial sounds easy-to-follow. Thanks! I just got a couple of pairs of hand-me-down jeans that I want to convert to skinny jeans. 🙂
You’re welcome, Becca! I have a few I should really make skinnier again too, come to think of it. Enjoy!
Such great instructions and inspiration -I went and turned a pair into skinnies right away, and I LOVE them -thank you so much~
I’m so glad to hear it! Thanks for stopping by.
I got a brand new pair of dark denim jeans at the thrift only to get them home and realize the legs were long and wide. I modified the inseam all the way to the crotch. They fit great! After all the tutorials I looked at I went with your’s because you showed using your favorite other jeans as a template. Smart lady!
Amazing! So happy to hear it. Hope your new jeans bring you years of enjoyment! Thank you for your comment.
Perfect timing! A pair of my jeans have been laying on the counter in my sewing room for quite a while now, because I was afraid to start the project. Thanks for the instructions and especially the pics!
Yay! Hope you love them!
Thank you!!!!!!!!!!!!!! Just last night I was thinking I wanna try this with a wide leg jeans I have, but never had experience doing so.
I APPRECIATE THE TUTORIAL. ^_^
You’re so welcome! I hope you love them.
5. Take jeans off (and replace them with others in case someone comes to the door).
I was thinking it just as it was the next step to read! Burst out laughing and scared to poop out of my animals. They’ll seek revenge, I’m aware! totally worth it and I am super grateful for the overlock stich tip! <3
Haha! Apologize to your animals for me.
Happy to help!
I’m really excited to try and make my skinny jeans. Thanks for explaining how to do it, and making it so simple. You’re great.
Aw. Thanks so much! Come back and let me know how they turned out.